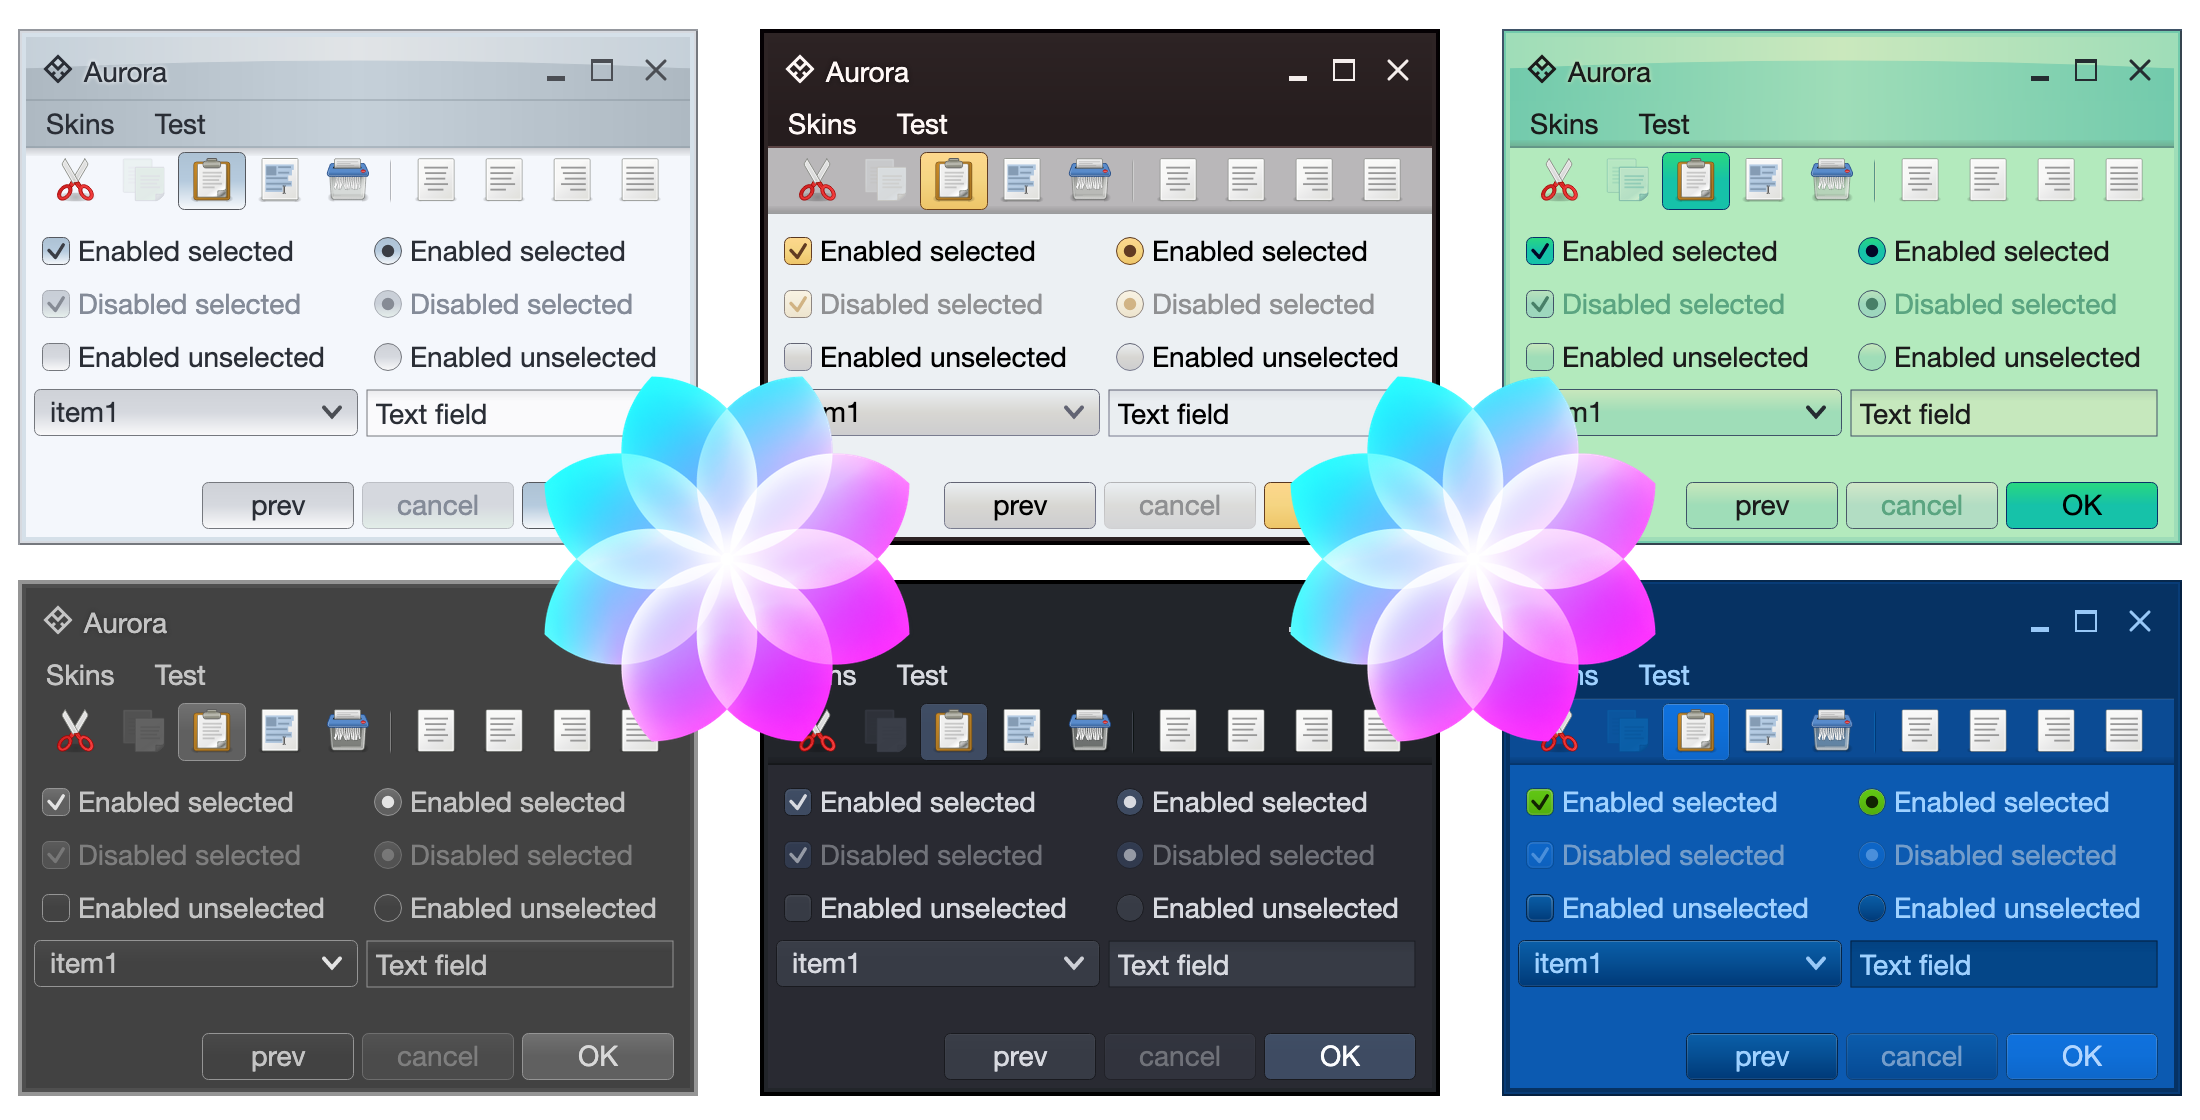
It gives me great pleasure to announce the second major release of Aurora. Let’s get to what’s been fixed, and what’s been added. First, I’m going to use emojis to mark different parts of it like this:
💔 marks an incompatible API / binary change
🎁 marks new features
🔧 marks bug fixes and general improvements
Dependencies for core libraries
- Compose Desktop: 1.0.0 ➡ 1.1.0
- Kotlin: 1.5.31 ➡ 1.6.10
- Gradle: 7.3 ➡ 7.4
Release notes
- 🎁 More interaction granularity for command button actions
- Auto-repeat action. Enabled with
autoRepeatAction boolean, initial delay configured by autoRepeatActionInterval, subsequent delays configured by autoRepeatSubsequentInterval
- Fire action trigger, configured with
actionFireTrigger and the new ActionFireTrigger enum that has three values:
OnRollover to fire action on rolloverOnPressed to fire action on pressOnPressReleased to fire action on press release (the default)
- 🎁 Add a breadcrumb bar composable for quick navigation of multi-level hierarchies, such as file systems, XML documents or abstract syntax trees. See documentation.
- 🎁 Support shader-based fill painters.
- 💔 Revisit the signature of shader-based decoration painters for API consistency.
- 💔 Convert command button panel to use lazy loading. Major performance improvements for panels with thousands+ elements.
- 🔧 Fix incorrect alignment of command button panel content when the content fits without the need to kick in scrolling.
- 🔧 Eliminate flash of color artifacts on opening popup windows.
- 🔧 Use bold font weight on decorated window titles.
- 🔧 Fix text overflow in command button panels with really long text on individual commands.
- 🔧 Fixexceptions when window is made smaller than the original size and starts to cut off some of the content.
- 🔧 Fix the display name in Cerulean skin definition.
This release (code-named Blizzard) brings a couple of new APIs, and otherwise is focused on stabilizing and improving the overall API surface of the various Aurora modules. There’s still a long road ahead to expand Aurora’s capabilities in 2022 and beyond, with the ribbon / command bar planned as the next big addition. If you’re in the business of writing Compose Desktop apps, I’d love for you to take Aurora for a spin. Stay frosty for more features coming in 2022!
Earlier in the Compose Desktop / Skia explorations:
Today, it’s time to take a look at how to leverage Skia to draw texts on paths:

Android’s Canvas class comes with a few API variants of drawing texts on paths, and those APIs are available to use in your Compose code running on Android via Compose’s Canvas.nativeCanvas. At the present moment, there is no such API available in Compose Desktop, and this article introduces just such the functionality for you to play with.
If you’re not interested in the particular details, you can head straight to the full implementation. Otherwise, let’s dive in.
First, the overall approach is going to be:
- Get the text metrics (details on the width and horizontal position of each glyph within the text)
- Get the path metrics for mapping each glyph to its position along the path
- Get the position of each glyph on the path
- Get the tangent of the path at that position to determine the glyph’s rotation
- Create a combined translation + rotation matrix for each glyph
- Create a combined text blob that contains position and rotation of all the glyphs
- [Optional] Draw the shadow for that text blob
- Draw that text blob
Now, let’s take a look at each step. We start with getting the text metrics. Note that at the present moment, there is no public bridge API that can convert Compose’s TextStyle into Skia’s Typeface or Font, so in the meanwhile we use the default typeface.
val skiaFont = Font(Typeface.makeDefault())
skiaFont.size = textSize.toPx()

// Get string glyphs, and compute the width and position of each glyph in the string
val glyphs = skiaFont.getStringGlyphs(text)
val glyphWidths = skiaFont.getWidths(glyphs)
val glyphPositions = skiaFont.getPositions(glyphs, Point(x = offset.x, y = offset.y))
Here, we’re using Skia’s Font APIs to get detailed metrics about each glyph – how wide it needs to be, and where it needs to be positioned (horizontally and vertically) if drawn along a straight line accounting for the specified offset.
Next, we’re getting the path metrics:
val pathMeasure = PathMeasure(path.asSkiaPath())
Next, we determine the start position of our text along the path based on the path pixel length, the text pixel length (based on the position and the width of the last glyph) and the requested text alignment. Note that here we do not support RTL or mixed direction texts.
val pathMeasure = PathMeasure(path.asSkiaPath())
// How long (in pixels) is our path
val pathPixelLength = pathMeasure.length
// How long (in pixels) is our text
val textPixelLength = glyphPositions[glyphs.size - 1].x + glyphWidths[glyphs.size - 1]
// Where do we start to draw the first glyph along the path based on the requested
// text alignment
val textStartOffset = when (textAlign) {
    TextAlign.Left, TextAlign.Start -> glyphPositions[0].x
    TextAlign.Right, TextAlign.End -> pathPixelLength - textPixelLength + glyphPositions[0].x
    else -> (pathPixelLength - textPixelLength) / 2.0f + glyphPositions[0].x
}
Now it’s time to start looking at each glyph to determine its position along the path, as well as how much it needs to be rotated to “follow” the curvature of the path at that particular position. Also, we need to decide what to do with the glyphs that do not fit into the path’s span. While it might be tempting to extrapolate the path beyond its starting and ending point, in this implementation we take a “safer” route and do not display glyphs that cannot fit.
First, we start with a couple of lists to keep track of visible glyphs and their matching transformation matrices, and start iterating over glyphs:
val visibleGlyphs = arrayListOf()
val visibleGlyphTransforms = arrayListOf()

// Go over each glyph in the string
for (index in glyphs.indices) {
    ...
}
Each glyph needs to be positioned along the path and rotated to match the curvature of the path at that position. Depending on the “nature” of the path, we are going to have more or less space between neighboring glyphs. For example, if you draw text along the outside of a tight curve, there’s going to be more space between the glyphs. On the other hand, if you draw the same text along the inside of the same curve, the glyphs are going to get crowded or might even start overlapping. There’s not much we can really do about that without morphing each glyph, which goes well beyond the scope of this article.
The simplest thing we can do here is to take the mid-horizontal point of the specific glyph, determine its position along the path and use that to cut off those glyphs that do not fit into the path’s span:
val glyphStartOffset = glyphPositions[index]
val glyphWidth = glyphWidths[index]
// We're going to be rotating each glyph around its mid-horizontal point
val glyphMidPointOffset = textStartOffset + glyphStartOffset.x + glyphWidth / 2.0f
// There's no good solution for drawing glyphs that overflow at one of the ends of
// the path (if the path is not long enough to position all the glyphs). Here we drop
// (clip) the leading and the trailing glyphs
if ((glyphMidPointOffset >= 0.0f) && (glyphMidPointOffset < pathPixelLength)) {
   ...
}
Now that we know that our glyph fits in the path, we ask the path measure to give us two things:
- The (x, y) point that matched the glyph’s mid-horizontal point along the path.
- The tangent of the path at that point.
// Where are we on our path?
val glyphMidPointOnPath = pathMeasure.getPosition(glyphMidPointOffset)!!
// And where is our path tangent pointing? (Needed for rotating the glyph)
val glyphMidPointTangent = pathMeasure.getTangent(glyphMidPointOffset)!!
With these two pieces, we can now compute the translation components of our matrix for this glyph:
var translationX = glyphMidPointOnPath.x
var translationY = glyphMidPointOnPath.y

// Horizontal offset based on the tangent
translationX -= glyphMidPointTangent.x * glyphWidth / 2.0f
translationY -= glyphMidPointTangent.y * glyphWidth / 2.0f

// Vertically offset based on the normal vector
// [-glyphMidPointTangent.y, glyphMidPointTangent.x]
val glyphY = glyphPositions[index].y
translationX -= glyphY * glyphMidPointTangent.y
translationY += glyphY * glyphMidPointTangent.x
And add the glyph itself, as well as its full rotation + translation matrix to our lists:
// Compute the combined rotation-scale transformation matrix to be applied on
// the current glyph
visibleGlyphTransforms.add(
    RSXform(
        scos = glyphMidPointTangent.x,
        ssin = glyphMidPointTangent.y,
        tx = translationX,
        ty = translationY
    )
)
visibleGlyphs.add(glyphs[index])
Now we’re ready to use the TextBlobBuilder API to create a single text run with the information on all the glyphs that fit along the path and their matrices:
// Create a single text run with all visible glyphs and their transformation matrices
val textBlobBuilder = TextBlobBuilder()
textBlobBuilder.appendRunRSXform(
    font = skiaFont,
    glyphs = visibleGlyphs.toShortArray(),
    xform = visibleGlyphTransforms.toArray(emptyArray())
)
val textBlob = textBlobBuilder.build()!!
Now we’re ready to draw the optional shadow
if (shadow != null) {
    nativeCanvas.drawTextBlob(
        blob = textBlob,
        x = shadow.offset.x,
        y = shadow.offset.y,
        paint = org.jetbrains.skia.Paint().also { skiaPaint ->
            skiaPaint.color4f = Color4f(
                r = shadow.color.red,
                g = shadow.color.green,
                b = shadow.color.blue,
                a = shadow.color.alpha
            )
            skiaPaint.maskFilter =
                MaskFilter.makeBlur(FilterBlurMode.OUTER, shadow.blurRadius)
        }
    )
}
And finally draw the text itself:
nativeCanvas.drawTextBlob(
    blob = textBlob,
    x = 0.0f, y = 0.0f,
    paint = paint.asFrameworkPaint()
)
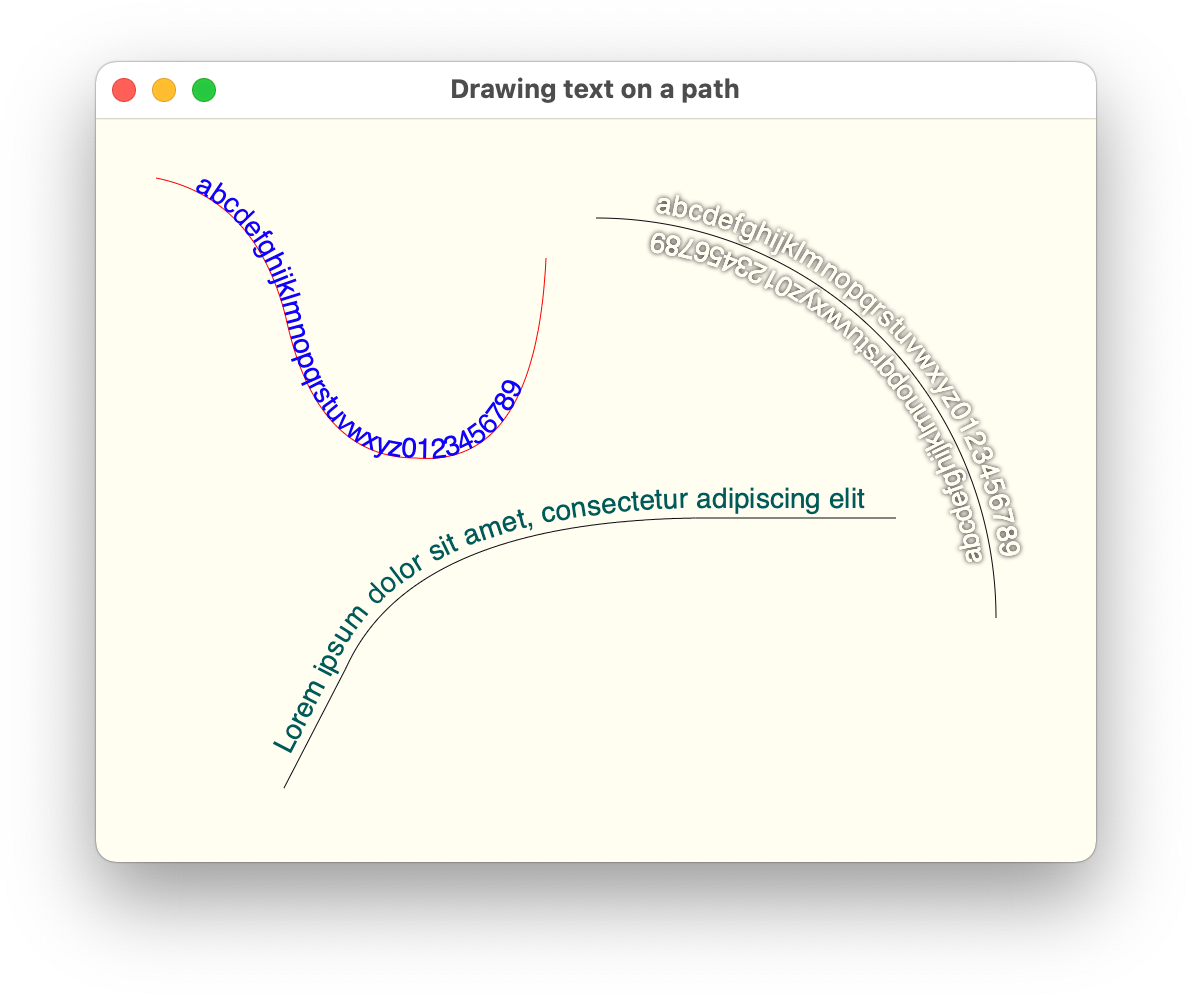
Let’s take another look at how our texts look like:

Here we have a few sample paths (each path is drawn for the sake of completeness) and texts that are drawn along their contours with and without drop shadows.
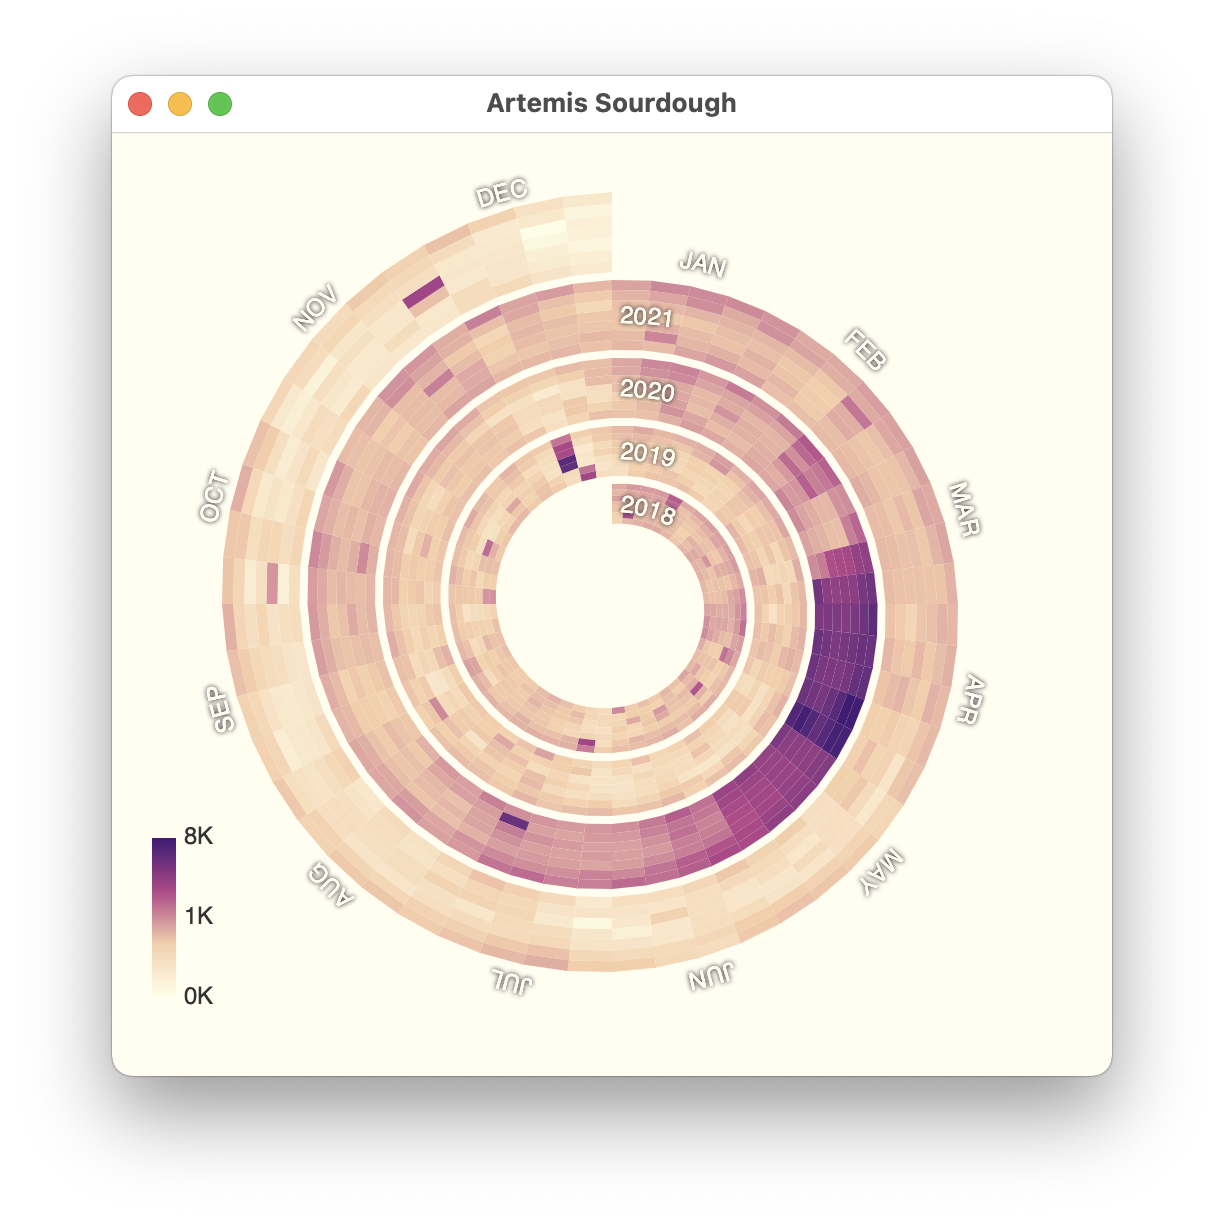
Now we can use this in a bigger example that loads daily visits data to a specific Wikipedia page (either remotely with Retrofit and Moshi, or from a local JSON file), and then displays that data as a seasonal spiral based on the visuals from this article:

The full code for this chart can be found over here.
This is it for this installment. Stay tuned for more explorations of Skia in Compose Desktop as the year progresses.
![]()