I first touched on the subject of resolution-independent Swing UIs and automatic support for high-DPI monitors about six months ago. This area has been pioneered by Karsten in his Looks family of look-and-feels. The code from Looks was used as a starting point of supporting resolution independence in Substance look-and-feel, and the last two versions provided the basic support, including automatic scaling of fonts, insets and other UI elements (such as check boxes, arrow icons, scroll bars and others).
When Mikael Grev has contacted me about two weeks ago about an article that he was going to write about the support for high DPI in his layout manager (MigLayout), he has provided a long-needed push for me to resume working on this part of Substance (thanks, Mikael). So, what was missing?
Quite a lot, actually, and the past two weeks have seen numerous improvements in this area across all the core Swing components. In this part, i’m going to talk about two area, alignment and baseline.
The first support for these two areas under Substance was introduced in this blog entry that showed how text components, combos and spinners have the same height (alignment). In addition, the inner texts are aligned as well (baseline). Here is a screenshot from that entry:

As it turns out, this is not an easy thing to achieve even for a fixed font size. To understand why, you need to understand how comboboxes and spinners are implemented.
- Text components (JTextField, JFormattedTextField, JPasswordField) are simple – they have a border, insets and the actual document that is displayed. The component bounds are computed from the document size and the insets.
- Non-editable comboboxes are more complicated. They have border, insets, arrow button and a cell renderer that shows the selected value. The cell renderer by default is a label with insets. The component bounds are computed from the label size, label insets, the combo insets and button bounds.
- Editable comboboxes have border, insets, arrow button and a text field (editor). The text field also has border (in most cases it would a non-painting one) and insets. The component bounds are computed from the text field document size, text field insets, the combo insets and button bounds.
- Spinners have border, insets, up button, down button and a text field (editor). The text field also has border (in most cases it would a non-painting one) and insets. The component bounds are computed from the text field document size, text field insets, spinner insets and button bounds.
So, how do you get all these components have the same height and the same text alignment? That’s the black magic of playing with the pixel insets in each one of the UI delegates. To get a small taste of what it feels like to be a look-and-feel developer, see the this source file from the Looks package.
And now imagine taking that implementation and scaling it to arbitrary font sizes (click the image to see more font sizes):

Now that is a whole new challenge – how to compute the insets of all the inner parts of comboboxes and spinners so that they scale with the resolution settings and remain globally aligned. Not to mention that the texts need to be aligned as well – here is a screenshot of three component rows under font sizes 22, 23 and 24 pixels (click to see full-size image):

Stay tuned for the next part when i will talk about scaling other visual parts of Swing UIs. Once again, thanks to Mikael for the challenge :)
The previous teaser post showed a small video with “ripple” effects – an application showing a ripple overlay with waves originating on mouse click, bouncing off component borders and decaying over time, along with the superposition effects. It gives me a great pleasure to announce the first alpha drop of the Strider project (code-named Alento), that will provide these effects to Swing applications.
It provides a custom glass pane that can be installed and configured in the following way:
private RippleGlassPane rgp;
this.rgp = new RippleGlassPane(getRootPane());
this.rgp.ignoreClicksOn(JTextComponent.class, true);
this.rgp.markAsMedium(AbstractButton.class, true);
this.rgp.markAsWall(JTextComponent.class, true);
this.rgp.setOpaque(false);
this.setGlassPane(this.rgp);
The following RippleGlassPane methods can be used in the application code:
ignoreClicksOn – mouse clicks on the specified components will not result in a ripple wave.markAsWall – bounds of the specified components will be marked as walls, resulting in ripple waves bouncing off.markAsMedium – area of the specified components will be marked as medium, resulting in ripple waves propagating slower.
The current drop is in alpha stage, lacking a few features (proper support for resizing and granularity). It’s very small (about 28KB, and unlikely to gain much more as the development continues), and can be used in any Swing application. It should be noted that it’s quite CPU intensive, since the entire wave simulation is done in software.
Once again, thanks to Paul Falstad who donated the original code under the BSD license. Stay tuned for more.
Wolfgang is writing about a new component available in the latest release of Synthetica Addons called System Monitor:

If you’re interested about details on how to fetch the system information, look at this article i’ve written a few weeks ago for java.net. While some information is available in the System and Thread classes, you can access much more using JMX MBeans, including the information on threads and memory.
Note that with JMX, you can get the information not only on the current JVM, but on any running JVM that supports JMX. For now, it looks like the System Monitor component only allows tracing information on the current JVM (but i might be wrong).
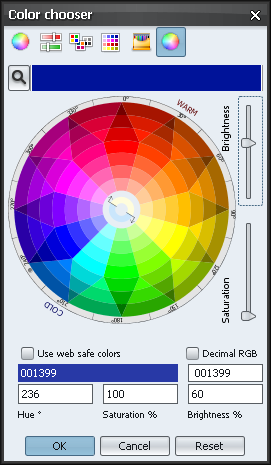
Luan O’Carroll of Xoetrope has been very active lately working on bug fixes and enhancements to the Xoetrope Color Wheel. It’s a Swing component that allows choosing colors in a very nice and visually appealing way, and it can be used in JColorChooser or as a part of larger UI (see video links below).
The latest additions available in the XUI itself as well as in the development version of Substance 4.1 add mouse-wheel support for the color wheel and the brightness / saturation sliders. This screencast shows the new features in action, and this screencast shows how the color wheel can be used in a larger UI.
In short, you can use the mouse wheel on the color wheel itself to play with the hue, and on the sliders to play with the brightness and saturation of the selected color. In addition, holding the Control key while wheeling over the sliders will apply the brightness / saturation on the color wheel itself. Here is how the color wheel looks like in default mode:
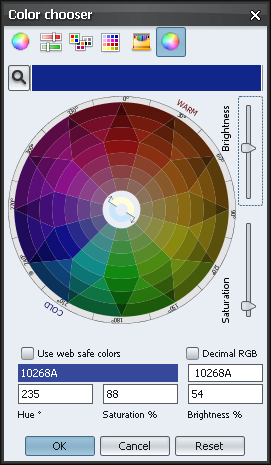
Here is how it looks like with decreased brightness:
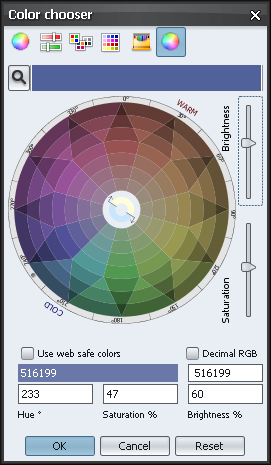
And here is how it looks like with decreased saturation:
If you want to reuse this component in your code (like the Colorspace of Teppefall), make sure that you read and follow the terms of XUI license (identical to Mozilla Public License) in XUI.license of Substance distribution.


