The previous entry has talked about the implementation details of the Eclipse Help view, and how it is using an embedded HTTP server powered by Jetty to serve dynamic content from a number of sources. Once you have such a custom server in place, you can embed a Browser control in any view / editor and call its setUrl method to show the required content. The links in the browser control will be handled in the same way as in the usual browser control – relative links will be served by the same HTTP server, and absolute links can point to content on the intranet or even external internet pages. But what about the live help actions?
The org.eclipse.help.ILiveHelpAction interface defines an entry point from Eclipse Help view “back” into Eclipse itself. If you include the PLUGINS_ROOT/org.eclipse.help/livehelp.js in your HTML document, you can attach a javascript:liveAction handler on the links in your document. This handler gets three parameters:
- ID of the plugin that contains the class defined by the second parameter
- Fully qualified class name that must implement the ILiveHelpAction interface
- Possibly empty parameter passed to the setInitializationString of the live help action instance
When such a link is clicked, the setInitializationString() and run() methods of the specified class are called. How does this work, and how can this be extended to work outside the Help view in any embedded browser control?
Here is the flow of execution in Eclipse 3.4 (all of these details are internal and subject to change in the future versions).
- The Help view is a collection of HTML pages. These are served from the org.eclipse.help.webapp plugin.
- One of the pages has an IFrame with 0*0 dimension named liveHelpFrame.
- The implementation of liveAction JavaScript method in the livehelp.js locates that frame and sets its location to the URL that encodes the three parameters (plugin ID, class name and argument string)
- A special livehelp servlet registered on the Jetty server gets this request. This servlet is implemented in org.eclipse.help.internal.webapp.servlet.LiveHelpServlet class.
- The doGet method checks that the embedded web server is running, and that the first two parameters are not null.
- The helper BaseHelpSystem.runLiveHelp locates the plugin bundle and loads the specified class. An instance of this class is created (the implicit assumption is that there is a public no-arg constructor).
- If specified, the argument string is passed to the setInitializationString of the created instance.
- A daemon thread based on this instance is created and started. Note that if your live help action needs access to the UI layer (to display a dialog, for example), the logic in the run method needs to be wrapped in Display.runAsync call.
rent a car bulgaria
Note that the above flow does not mention the actual contents of the 0*0 IFrame being used in the process. The whole reason for this frame’s existence is to make a call to the live help servlet. The LiveHelpServlet.doGet does not make anything with the resp object.
As can be seen from this flow, including the livehelp.js and putting a javascript:liveAction on the HTML anchor is not enough. The implementation of the JavaScript liveAction method makes certain checks to ensure that the browser is the one from the Help view. As such, if you click on this link in a browser control placed in another view, it will not result in invoking the specified action.
Until this functionality is supported by Eclipse in a published way, we can mimic this flow in a custom view / editor. Here are the basic steps – assuming that you have a browser control and a Jetty server / servlet already configured.
- Add two more servlets. The first will serve the “core” content, such as a custom livehelp.js, the initial blank content of the invisible IFrame and possibly a custom CSS. The second will handle the live help requests.
- Modify your existing servlet (that serves the usual HTML pages) to inject two pieces into every HTML file that it serves.
- The first piece is a HEAD tag to include the livehelp.js from the new core servlet. This piece can also include a link to the custom global CSS file.
- The second piece is a 0*0 IFrame named liveHelpFrame with initial content set to a blank page served by the core servlet. It is very important to obey the cross-scripting limitations placed by the browsers to make sure that a javascript handler on the main content can change the location of this IFrame.
- Implement the livehelp.js based on the core Eclipse script. You can simplify the implementation since you know exactly where to look for that IFrame. Get the URL of the window, strip away the trailing parts and replace them to point to your live help servlet. Add plugin ID, class name and the argument to the resulting URL to make sure that these are passed to the servlet. Finally, set the complete URL to be the location of the invisible IFrame. This will result in a call to the servlet, but leave the visible browser content unchanged.
- The implementation of the core servlet is very simple, fetching the required content from the bundled files (just like the servlet that is serving the rest of your files).
- The implementation of the live help servlet is the same as the core Eclipse one. Parse the parameters, make sure that the plugin ID and class name are present, load the class, create an instance of that class and then run its run method on a new daemon thread.
Congratulations – you have your own browser that is able to display a rich collection of interlinked documents and invoke actions defined in your plugin classes, interacting with other parts of your plugins / application.
How is Eclipse Help view implemented? This view is a rich collection of interlinked documents that provide the usual functionality of embedding images and navigating between different pages. In addition, it supports live help actions – hyperlinks that can call Eclipse actions (Java code). How is this implemented?
In a usual setup, the HTML content is stored in the file system. If the requested HTML page contains embedded images, these are stored as separate files, and requested separately by the browser. However, the main contents of Eclipse Help view come from one single file – the org.eclipse.platform.doc.user.jar in the plugins folder. This jar contains around one thousand files (in Eclipse 3.4), including HTML and PNG images. How do these get displayed in the Eclipse Help view?
A straightforward approach would be to “explode” the contents of this jar at runtime (the first time the Help view is activated) and then link directly to the files in the filesystem. This is simple to implement, but would require some bookkeeping to clean the files on closing the workspace. Also, you’re going to pay the performance penalty the first time the files need to be extracted from the archive and written to the disk. Instead, Eclipse 3.4 uses an embedded Jetty HTTP server with custom servlets to serve the content of the Help view.
While the implementation of the Help view is deep inside the internal packages of org.eclipse.help.webapp plugin, this functionality can be recreated by using public extension points (thus ensuring upgradability to the next Eclipse versions). The steps below describe the general setup of an embedded Help HTTP server.
First, you need to specify three extension points in your plugin.xml. For the complete example see the plugin.xml of the org.eclipse.help.webapp plugin. The extension points are:
Jumping a little ahead of time (the complete structure will be explained later), the URLs requested from the HTTP server will look like this:
http://127.0.0.1:12345/primaryID/secondaryID/relative/path/to/your.html
The primaryID is the HTTP context ID specified in the first extension point above. It is also used in the specification of the second and third extension points. The secondaryID allows mapping your content via different servlets (see later). In the simplest example (where all content is coming from the same archive), you will have only one servlet specified in the third extension point. The last identification string is specified on the second extension point – it is the other.info filter on the service selector. This string must be the same as the one set during the initialization of Jetty server (see below).
Your MANIFEST.MF will need two changes. The first one is the Import-Packages section and should have the following entries:
- javax.servlet
- javax.servlet.http
- org.osgi.service.http
The second one is in the Require-Bundle section and should have the following entries:
- org.eclipse.equinox.http.jetty
- org.eclipse.equinox.http.servlet
- org.eclipse.equinox.http.registry
These sections will make sure that you will be able to use the relevant classes in your custom Jetty server and servlets.
The next step is the class that controls the lifecycle of the embedded Jetty server. This is the 127.0.0.1:12345 part in the URL above – it is a local HTTP server that is listening on port 12345. Since this specific port may be taken by another application, we are going to ask Jetty to auto select an available port. The complete implementation of the Jetty configurator can be found in the org.eclipse.help.internal.server.WebappServer class, and the main steps are:
-
Make sure that you’re running only one instance of the HTTP server (instead of creating a new instance for each HTTP request).
-
The http.port parameter should be set to 0 to allow Jetty to auto-select an available port.
-
The context.path parameter should be set to the HTTP context ID (primaryID in the example above).
-
The other.info parameter should be set to the same value as the service selector filter in the second extension point in the plugin.xml.
-
INFO / DEBUG messages of Jetty should be suppressed.
-
To check that Jetty has successfully started, get the org.eclipse.equinox.http.registry bundle and check that its state is RESOLVED.
-
To get the Jetty port (for creating the URLs), get the service reference for org.osgi.service.http.HttpService class and (other.info=yourServiceSelectorFilter) filter. Then, get the http.port property and cast it to Integer.
The next step is to create a custom servlet that will intercept the relevant HTTP requests and load the content from your archive. The complete (and very simple) example can be found in the org.eclipse.help.internal.webapp.servlet.ContentServlet class (registered with the third extension point above). In its init() method it creates a custom connector instance (more info below) and uses it in the doGet() and doPost() methods.
The last piece is the connector itself. It analyzes the incoming request, maps it to the corresponding resource and then transfers the resource contents to the response output stream. The beauty of this connector is that the content can come from anywhere. It can be a local file, a file in an archive, or it can be dynamically generated (corresponding to the requested resource, of course).
While EclipseConnector looks at a variety of sources to get the content and provides a custom error page implementation, the logic is very simple. In a simple example where all the content is coming from one archive, you create a URLClassLoader pointing to that jar (this should be done in the constructor to make the subsequent requests faster) and use the getResourceAsStream passing the trailing portion of the URL (stripping away the host, port, primary ID and secondary ID parts). If the returned InputStream is null, you can return a custom error page.
While the above may sound an overkill, it is quite useful and much more flexible than shipping a huge collection of separate files. With a custom HTTP server and a servlet you can control the contents of error page, fetch the content from multiple locations or even create the content dynamically from a database or another source.
Here are some Swing links that you might have missed during the last week:
- Roman Kennke posts an update on the Java2D stack on VxWorks which is now functional enough to run SwingSet2. The followup post has more screenshots of SwingSet2 running under JamaicaVM and OpenJDK stack.
- Looks like JavaFX development is going to bring performance improvements back to Java2D and Swing applications. Bug 6766336 aims to use SSE / MMX CPU instructions to speed up the software pipeline – i have mentioned that while the new Direct3D-accelerated pipeline is great for the modern hardware, the “enterprise” desktops usually only have integrated cards. Bug 6766342 aims to improve the (closed-source) Ductus rasterizer on anti-aliased paths, while bugs 6767500, 6767506 and 6767516 aim to improve performance of various primitives on the hardware accelerated pipelines.
- An interesting bug (6740419) has been opened to provide better control over text grid fitting in Java2D. The subject of printing fidelity has been addressed at length last year by Jeff Atwood and Joel Spolsky, and it looks like the designer team behind JavaFX is pushing for Apple-style font rendering in JavaFX. I have already talked about why it is a bad idea, and the introduction of DirectWrite in Windows 7 (more on this in a later post) will obviate the need to invest the precious time in supporting this feature in JavaFX.
- Jean Francois Poilpret has announced release candidate for release 1.0 of DesignGridLayout.
- Adam Bien compares Eclipse RCP and NetBeans RCP and leans towards the later in his recommendations. I don’t have any experience with NetBeans RCP, but i’ve been doing heavy Eclipse / SWT work over the last three years at work. I have almost never considered SWT / Eclipse to be more limiting that Swing. In fact, once you understand that it’s better not to fight the platform and instead tweak your design to match the recommended UI guidelines of the platform (re vertical labels in tables), you will find SWT / JFace combination (especially with the Instantiations designer) a very productive and enjoyable environment. Not to mention that you can most certainly create non-Eclipse looking SWT applications, and this is going to be much easier in the near future.
- Ayman Al-Sairafi has announced release 0.9.3 of the JSyntaxPane component. New in this release – line numbering, reworked Find / Replace dialog and support for Python, C, C++ and Ruby syntax.
Finally, if you are interested in the responses to my posting on the state of core Swing, you’re welcome to read the following:
And Dale Beermann has an interesting series about moving a large Java project to Flash and ActionScript. The first post addresses the reasons why this port has been done, while part 2, part 3 and part 4 (ongoing series) address the specific technical issues in porting Java code to ActionScript.
Once a subject of heated discussions, the native vs. cross-platform skinning has not been mentioned for quite some time in Swing blogosphere. While this post by no means aims to revive the dead ghosts, i saw something quite interesting in the PDC session on the Windows 7 Explorer. It looks like (at least in the current builds) Microsoft has decided to enforce better consistency across the UI layer of its flagship desktop products, including Office and Media Player. This specific issue has been brought as one of the major arguments against using a native look-and-feel (because the lack of consistency effectively meant that there is no native look-and-feel).
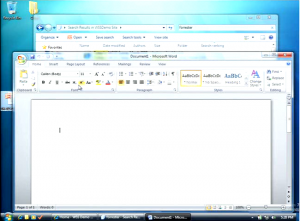
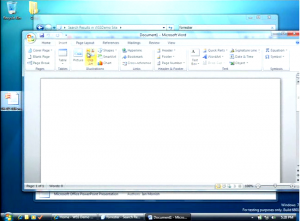
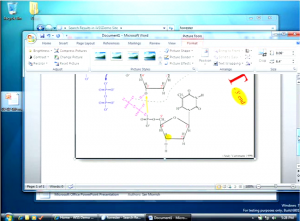
The following three screenshots show (what i presume to be) the next version of Office running on Windows 7. These were taken from the video stream and the quality is not the best, but the overall trend is still quite noticeable. The landmark Office ribbon that was skinnable as silver / blue / black in Office 2007 is now consistent with the platform look-and-feel (read more about the scenic ribbon in the PowerPoint slides of this PDC session). I’m not sure whether the presenter meant to show the new look of Office, or even if this is the final look. However, the screenshots clearly show that the ribbon UI is now much more consistent with the the rest of OS, including the colors, gradients, the glass chrome on the title pane and other UI bits (click to see full size view):


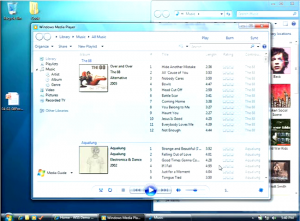
The same goes for the Windows Media Player. The screenshot below (click for full size view) shows a somewhat partial UI in the top bar (no icons on the twin round buttons), but the heavy glossy black / dark blue chrome found in the current Media Player UI is (at least for now) gone:

Standardizing the UI look of different bundled and add-on programs in Windows 7 is an interesting trend that is worth following in the months to come.